Small Engine Device Charger INSTRUCTIONS
Installation Instructions – Minibike Device Charger
-------------------------------------------------------------------------------------------------------------
Thank you for purchasing the Minibike Device Charger from Qman’s Garage! Follow these steps carefully to complete the installation and enjoy on-the-go charging!
You can Alternatively watch the installation video by clicking the youtube link below:
Note: You will need at least 2 Zip ties (not included)
Step 1: Prepare for Installation
Choose your mounting location on the frame.
Use a spot that is secure and away from the exhaust, as extreme heat could damage the charger.
- Before mounting, complete the wiring as described below.
Step 2: Wiring the Charger
The charger has two wires, each with pre-installed T-taps. Follow these steps to properly connect the T-taps to your minibike’s wiring:
- Remove the pre-installed T-taps from the charger wires for proper installation.
- Locate your minibike’s charge coil output wires, typically brown (positive) and yellow (negative). If your wires are a different color:
- Use a multimeter to determine which wire is positive and which is negative.
- Install the T-taps onto the minibike’s charge coil wires:
- Place the brown charge coil wire inside the T-tap’s groove.
- Squeeze the T-tap tightly with pliers so that it cuts through the insulation and makes contact with the wire’s metal core.
- Check the connection by opening the T-tap to ensure it has cut through the insulation. If it hasn’t:
- Strip a small section of insulation from the coil wire and reattach the T-tap over the exposed section.
3.5. Repeat step 3 for the yellow (ground) wire.
- Connect the spade connectors from the charger wires to the T-taps:
- Connect the red wire to the positive brown wire and the black wire to the yellow ground wire. Ensure the spade connectors insert into the center of the T-taps; they may feel connected even if they slide slightly above or below, so double-check they properly inserted!
Step 3: Test the Charger
- Start your engine before mounting the charger to test the wiring.
- Plug a device into the charger to confirm it’s working.
- If you have the USB-A + USB-C model, test both ports (Type-C and Type-A).
- **Note:** iPhones can only charge via the USB-A port. The USB-C port is meant for smaller electronics Such as: Cameras, Walkie-talkies, Portable speakers, Rechargeable lights
- If the charger does not power your device, double check the wiring connections.
- If you have a low idle, you may need to rev the engine slightly to ensure an adequate voltage.
Step 4: Mount the Charger
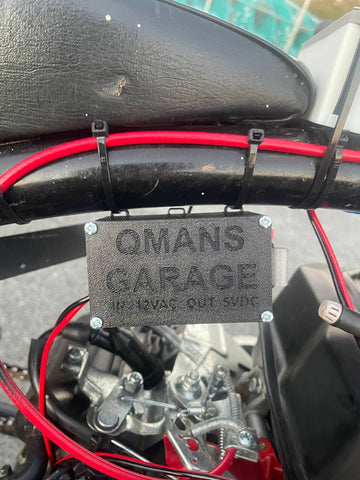
- Use the 10-point latch system to attach the charger to your minibike’s frame.
- Insert zip ties through the latch points in the positions that best suit your mounting location.
- Loop the zip ties around the frame, ensuring the charger is secure and doesn’t move while riding.
- **Use at least two zip ties** for stability.
- Ensure the charger is not near the exhaust to avoid heat damage.
(See pictures below for example mounting positions)
- Once mounted, make sure the charging ports are covered when not in use to maximize the life of the device.You can now charge your devices on the go!
Install Complete!


**Technical Specifications & Troubleshooting**
- **Input Voltage:** 5-30V (AC or DC) - **Output Voltage:** 5V, 2A
Weather Resistance: Splash-proof and rain-resistant. Not designed for riding in the rain for extended time with ports uncovered.
- Charging Ports:
- USB-A Port: Suitable for smartphones (e.g., iPhones)
- USB-C Port (if included): For smaller electronics (e.g., cameras, speakers)
- Cannot charge two high-draw devices simultaneously (e.g., an iPhone + a laptop).
If overloaded, the charger will emit a **high-pitched sound**. Disconnect one device if this occurs.
- Usage Note: It is normal for the charger to get warm, especially if stationary, it works best while riding.
**Troubleshooting Guide**
- **Issue:** Charger not working after wiring.
- **Solution:** Check that the T-taps are properly cutting through the wire insulation. If not, strip the wire and try again.
- **Issue:** Spade connector not seating properly.
- **Solution:** Ensure the spade slides into the center of the T-tap. If it's off-center, it may not make contact.
- **Issue:** High-pitched sound coming from the charger.
- **Solution:** The device is overloaded. Unplug one of the connected devices immediately.
- **Issue:** Device not charging only while idling.
- **Solution:** Increase the engine’s idle speed or rev the engine to provide more power to the charger.
